OCA Spaces Support & Guidance
Gutenberg Editor
This sub-chapter is broken down into several headings;
Gutenberg Editor Explained
The Gutenberg editor, also known as the “Block Editor”, uses a combination of diverse multimedia blocks, metaphorically similar to LEGO. Each of the available block types provide different capabilities and support for different media types, such as text, images or video, and when combined together can be used to construct your blog post.
The screenshot below illustrates the contents of a typical blog post and how the content is constructed using the various block types.

Accessing the Gutenberg Editor
To access the Gutenberg Editor, you’ll first need to access the WordPress Dashboard, as outlined in step 2b of the Accessing your Learning Log section.
Upon accessing the WordPress Dashboard, you’ll then need to select the ‘Posts’ option, located in the left hand menu and as highlighted in red in the screenshot below. Selecting this option, and as highlighted in purple, you’ll be able to access any existing blog posts, including those created using the frontend editor.
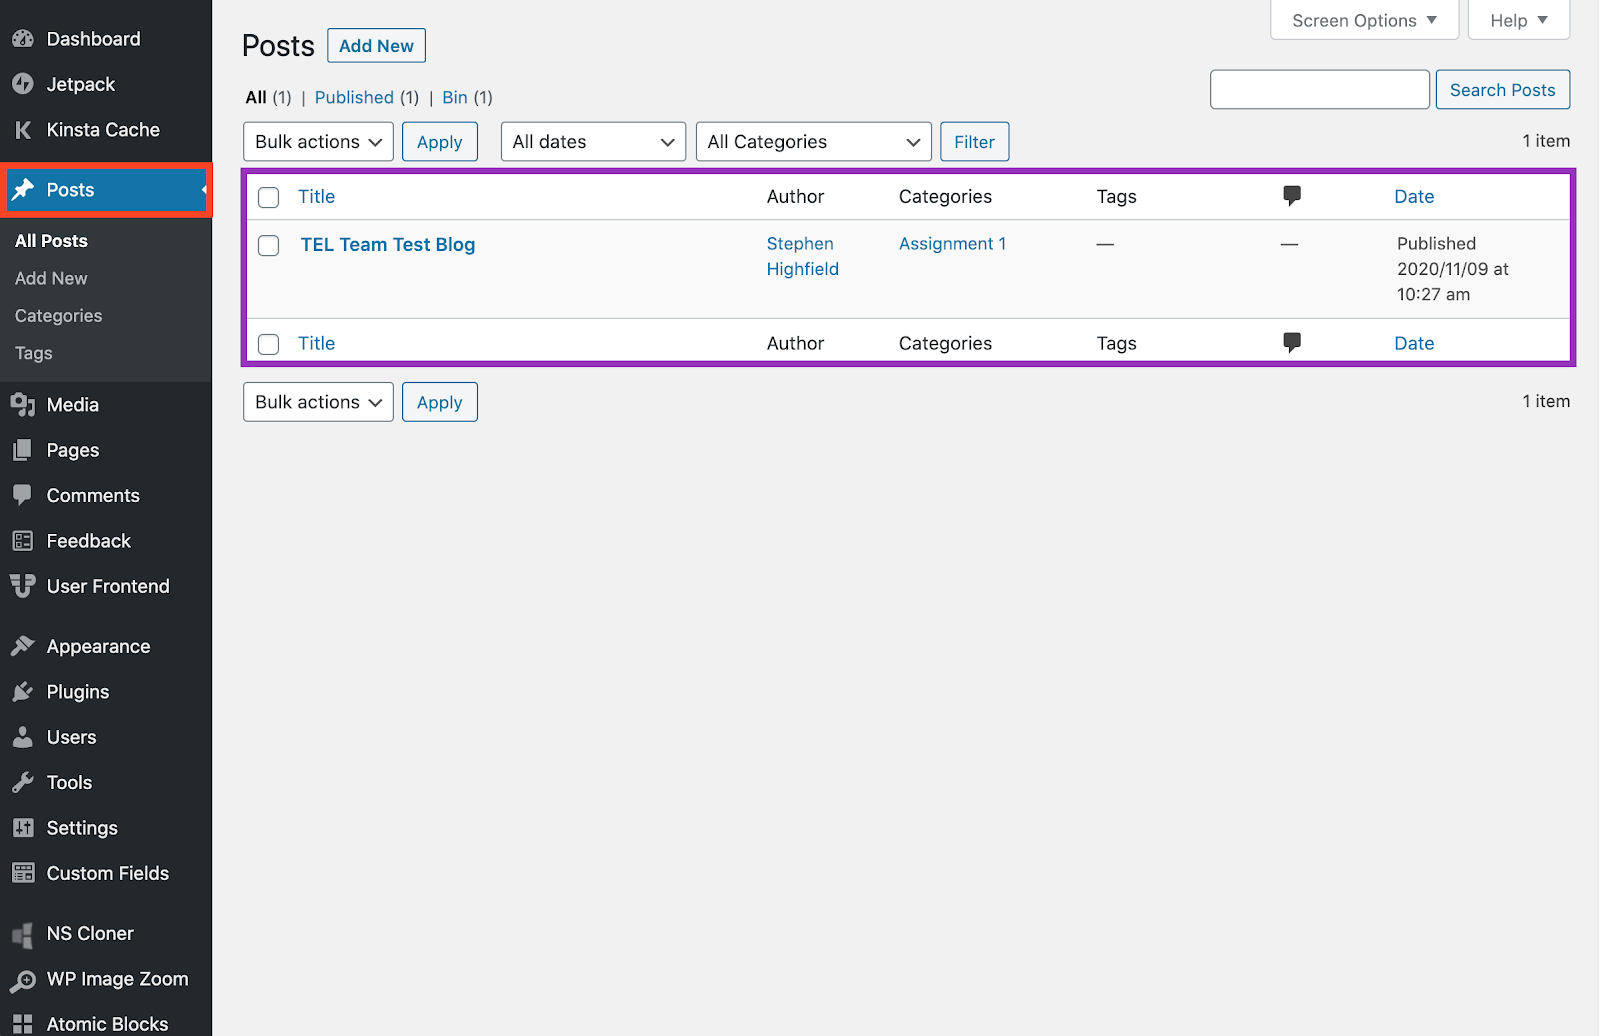
Additionally, you can also select either of the ‘Add New’ options, as highlighted in red in the screenshot below, to create a new blog post. Accessing an existing or creating a new blog post from the WordPress Dashboard and following this method will use the Gutenberg editor.
![The 'Posts' interface with the 'Add New [Post]' option highlighted in red.](https://learn.oca.ac.uk/pluginfile.php/51558/mod_book/chapter/2534/Gutenberg%20Editor%20-%20New%20Post.png)
Gutenberg Editor Interface
The following interactive Gutenberg Editor Interface activity provides information on the various applicable options available whilst using the Gutenberg editor. Begin by selecting any of the 'i' icons to find out more information about a specific option.
Using the Gutenberg Editor
Upon Accessing the Gutenberg Editor, you’ll first need to title your post by replacing the ‘Add title’ text, as highlighted in the screenshot below.
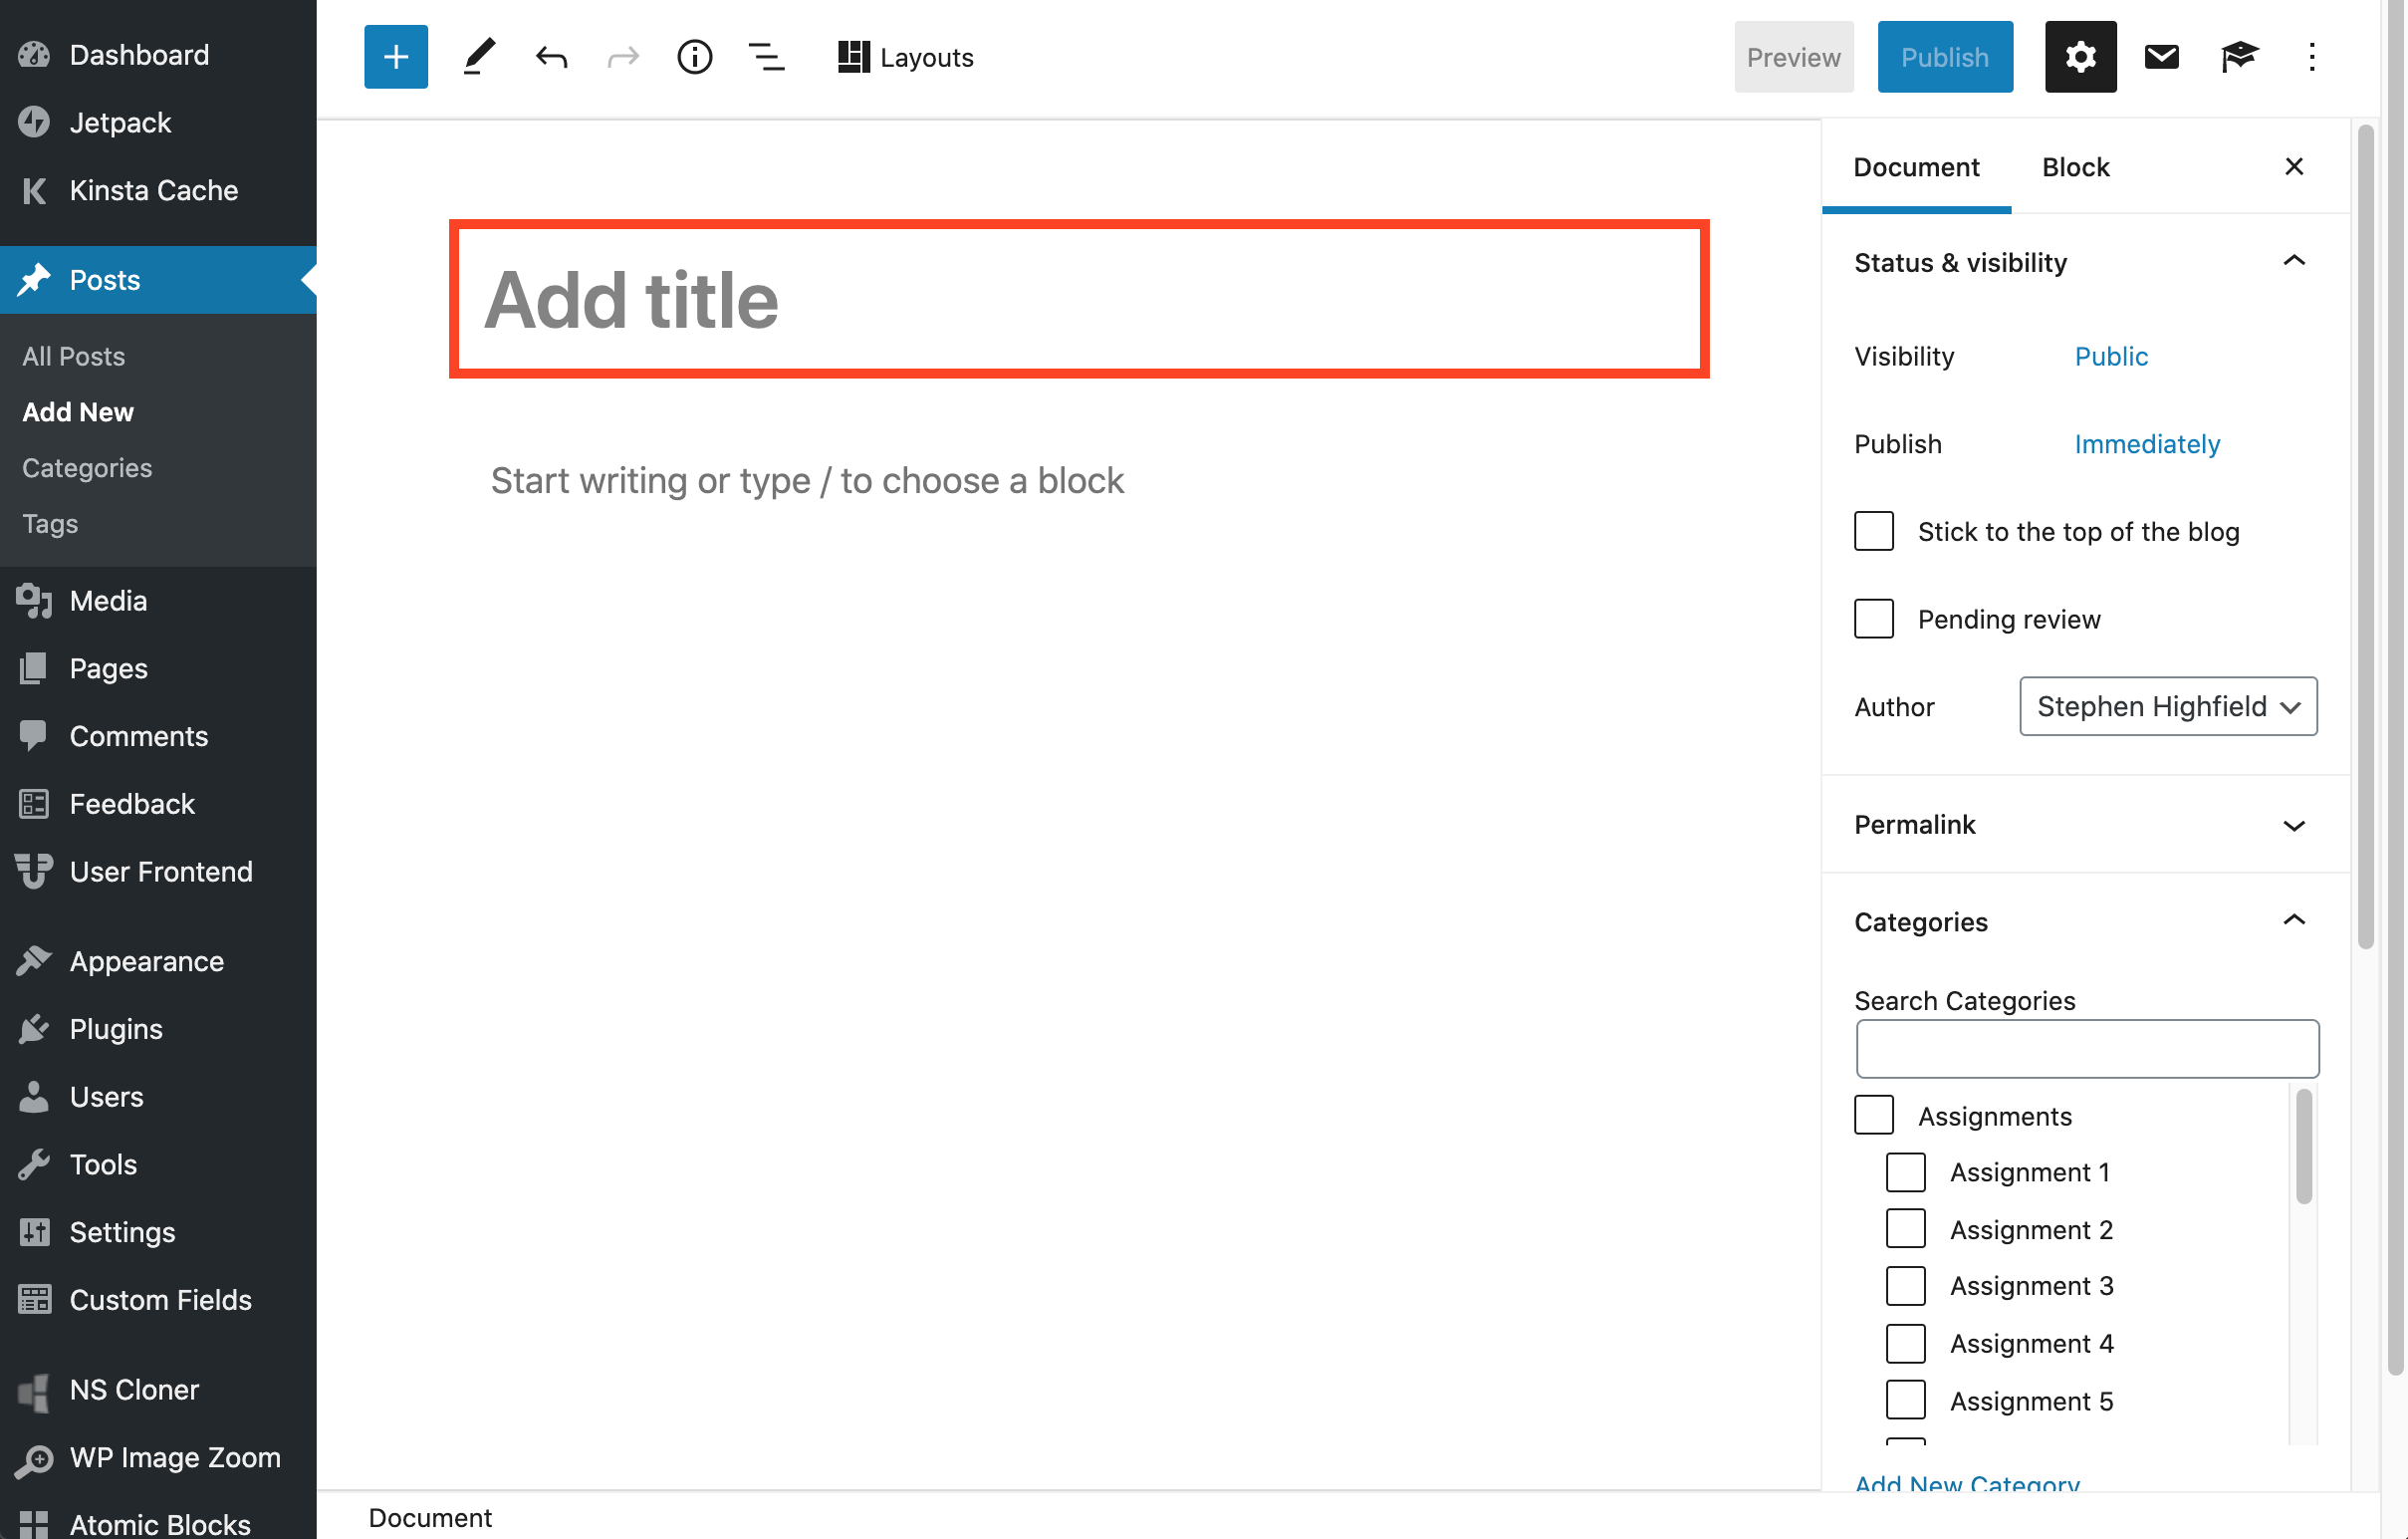
After adding a title, you can then use the default paragraph block, highlighted in the screenshot below, to begin adding text to your blog post, however, this can be changed or removed, and/or subsequently added to as explained below;

Blocks
Adding a new block
While there are multiple ways to add a new block, the TEL Team would recommend that beginners begin by selecting the blue ‘+’ icon, located in the upper left corner. Selecting the ‘+’ icon will open the block menu, where you can hover over a particular block to find out more information, such as its capabilities and supported media, before selecting it to add the block to your post. For more information on the various blocks available, please visit the Block Types sub-chapter.
The screenshot below indicates the aforementioned blue '+' icon, highlights the more common block types and provides an example block description.

Alternative methods to adding a new block include pressing the enter key on your keyboard or by selecting the black '+' icon that appears to the right of any 'Paragraph' block when selected.
Block Types
The Gutenberg editor offers several block types, the majority of which are unlikely to be applicable to OCA Students, and the TEL Team have therefore explained the capabilities and use case for some of the more common block types below;
- Paragraph: Paragraph text entry and the default block, best suited for adding standard paragraph text.
- Heading: Heading text entry with several enlarged heading fonts, best suited for creating headings and/or sub-headings.
- List: Used to create bullet pointed and/or numbered lists.
- Image: Supports a single image upload.
- Gallery: Supports multiple images in an organised and optionally smaller format. The only block type to support images which can be enlarged and viewed at their native resolution when selected; for information on this process can be found in the Enlarging Images sub-chapter.
- Media & Text: Supports media, such as an image, to appear alongside text.
- File: Supports the upload, display and download of a file, such as a PDF document, for example.
Deleting a block
To delete a block, first select the appropriate block, followed by the backspace key on your keyboard or by selecting the ‘Additional Options’ option, as explained in the Gutenberg Editor Interface sub-chapter, followed by ‘Remove [block type]’.
Changing the block type
In the instance you want to change the block type, for instance, you’d like to convert a ‘Paragraph’ block into a ‘Heading’ block, first select the appropriate block followed by the ‘Convert To’ option, as explained in the Gutenberg Editor Interface sub-chapter
Rearrange blocks
To move or rearrange a block(s), first select the appropriate block followed by either of the ‘Move Up’ and/or ‘Move Down’ options, as explained in the Gutenberg Editor Interface sub-chapter
Categorising a blog post
Having completed your post and prior to publishing, the TEL Team strongly recommends categorising your blog post.
Categorising your blog post helps ensure that those accessing your learning log, and particularly your tutor, are able to use the menu to find the relevant post(s). When left uncategorised, your post will only be available on your learning log homepage alongside all other blog posts.
To categorise your blog post, select the ‘Settings’ (Cog) icon, located in the upper right corner and as explained in the Gutenberg Editor Interface sub-chapter, followed by the ‘Categories’ dropdown menu. Within the ‘Categories’ dropdown menu, you can then select the relevant category(s). When selecting a sub-category, such as ‘Assignment 3’, the TEL Team also recommends selecting the relevant parent category, in this instance, ‘Assignments’.
The screenshot below demonstrates the process of categorising your blog post.

Publishing a blog post
Having successfully constructed and categorised your blog post, it’s finally time to publish it and make it available to everyone. You can publish your blog post by selecting the blue ‘Publish’ option, located in the upper right corner and as explained in the Gutenberg Editor Interface sub-chapter.
When publishing your post, the TEL Team strongly recommends leaving your post privacy setting as ‘Public’, and anything besides this option will restrict your tutor - and anyone else accessing your learning - from accessing this particular post.
Additional Features
Font Colours
Available within the Gutenberg editor and with any text based block, such as a ‘Paragraph’ or ‘List’ block selected, there are two font colour options available;
- Selecting the ‘Settings’ (Cog icon) - located in the upper right corner - followed by the ‘Colour’ dropdown menu and the ‘Text’ option, can be used to change the colour throughout the entirety of the selected block.
- Alternatively and to change the colour of a specific word, phrase or sentence, select the appropriate text followed by the ‘Additional Font Options’ (South facing arrow) - as demonstrated in the Gutenberg Editor Interface sub-chapter - followed by ‘Highlight’.
In both instances, a custom colour can be selected by selecting the transparency indicator. However, custom colours cannot be saved to the default colour palette, and the TEL Team would therefore recommend making note of your chosen colours HEX code, should you wish to use the same colour throughout your blog post(s).
HTML Anchors
HTML anchors can be used to link to a specific section or heading, either within the same or a different blog post, an example of this would be the sub-chapters, linked at the top of this chapter. HTML anchors can be particularly useful when wanting to cite or reference a specific section within one of your blog posts.
To create a HTML anchor, first access the blog post in which you’d like to link to. Upon accessing the appropriate blog post, then select the block that you’d like to specifically link to, followed by the ‘Settings’ (Cog) icon - as explained in the Gutenberg Editor Interface sub-chapter - and finally the ‘Advanced’ dropdown menu. Within the ‘HTML anchor’ field, enter an anchor ID; the ID isn’t important although you will need to remember it for the following step; it also must not include any spaces. Complete this first step by ‘Updating’ or ‘Publishing’ your blog post.
Having created the HTML anchor, we now need to create a link to it. Do this by navigating to the appropriate blog post - assuming you’re not linking within the same post, and in which case you can continue working within the same post - and highlight the appropriate string of text that you’d like to link from. With the appropriate string of text highlighted, you’ll then need to select the ‘Link’ option, as explained in the Gutenberg Editor Interface sub-chapter.
If you’re creating a link within the same blog post, in the ‘Link’ window, enter “#” followed by the anchor ID, for instance, “#Example”. You can then finish by updating or publishing your post.
If you’re creating a link to a different blog post, in the ‘Link’ window, first paste a link to the post you’d like to link to - which must be taken from the frontend and not from within the Gutenberg editor - immediately followed by “#” and the anchor ID, for instance, “spaces.oca.ac.uk/[PostURL]#[AnchorID]”. You can then finish by updating or publishing your post, although for the link to work successfully, both posts will need to be published.
“Link to” is defined at the post, section or heading you’d like or intend to reference.
“Link from” is defined as the text that you’d like users to select prior to navigating to the post, section or heading you’re referencing.
Enlarging Images
Students familiar with WordPress maybe aware of a feature which allows a user, such as your tutor, to select an image where they’ll then be available to view it at its native resolution. While OCA Spaces doesn’t support this feature by default, there is an available workaround only available when using the ‘Gallery’ block.
While a ‘Gallery’ block is intended for use with multiple images, there is no downside to using it to display a single image, as an ‘Image’ block would otherwise do.
Should this be a feature you’d like to enable, you’ll need to repeat the following process on each and all of the ‘Gallery’ block(s) where you’d like the feature to be available.
Having inserted a ‘Gallery’ block and subsequently your image(s), first ensure the block - and not a specific image within the block - is selected, before selecting the ‘Settings’ (Cog) icon. If for any reason you’re unable to select the ‘Gallery’ block specifically, the TEL Team would recommend using the ‘List View’ option to select it; this and the ‘Settings’ icon are both explained in the Gutenberg Editor Interface-chapter.
With the ‘Gallery’ block now selected, next select the ‘Gallery Settings’ dropdown menu and change the ‘Link to’ option from ‘None’ to ‘Media File’.
Following this process will ensure that selecting any of the image(s) within the ‘Gallery’ block can now be selected and viewed at their native resolution.
Create Citations
Unfortunately, due to the discontinuation of the Academic Bloggers Toolkit and the several issues which have since arisen, the TEL Team have made the decision to permanently disable the Academic Bloggers Toolkit plugin, with a view to replacing it in the distant future. In the meantime, students will need to manually create and add their own citations. Any existing citations created using the Academic Bloggers Toolkit should remain unaffected.