Further Support & Guidance
| Site: | OCA Learn |
| Course: | Tech Support, Guidance & Workshops |
| Book: | Further Support & Guidance |
| Printed by: | Guest user |
| Date: | Monday, 6 July 2026, 4:30 PM |
Description
This activity contains ad hoc support and guidance which isn't directly applicable to any previous section.
Getting Started
Use the chapters available on the left to navigate to a specific topic, or read through the entire activity for a broader view of additional OCA facilities.
All information and guidance available throughout this activity is accurate and correct of July 22nd 2022.
Once complete, continue through the remaining support and guidance sections before providing feedback, requesting additional guidance or reporting any mistakes using the Tech Support, Guidance & Workshops Feedback activity.
Microsoft Office 365
Available through your OCA email account, all OCA staff and students are able to access and, if preferred, download Microsoft Office 365.
However, due to several known and peristsant issues which are beyond the scope of the TEL Team, the TEL Team would instead recommend using Google Drive and the Integrated Applications. At a minimum, the TEL Team would recommend downloading the Office 365 suite, storing any files locally or on Google Drive, and thus avoiding the use of OneDrive.
Access Microsoft Office 365
First sign into and access your OCA email account followed by the Google Applications Menu - as explained in the Google Homepage Interface chapter - and select the ‘MS Office 365’ app.
Selecting the application whilst signed into your OCA email account will sign you in automatically. In the event you're signed into multiple Google accounts and aren't using separate Google Chrome Profiles - as suggested in the Google Support & Guidance section - you'll need to select your OCA account from a list of signed in users.
In the event you encounter an error message when trying to sign into the MS Office 365 app using your OCA email address, please contact the IT Support, preferably also providing a screenshot of the error message you encountered.
Upon signing into the MS Office 365 app, you’ll be able to create or access an existing document using the OneDrive interface or access MS Office 365 applications through your web browser.
OneDrive
Upon immediately accessing the MS Office 365 app, you’ll be presented with the OneDrive interface, whereby you’ll be able to access any existing files or select any of the available programmes, listed on the left, to start a new document. Any documents created following this process will be saved to your OneDrive, but can be downloaded by selecting the file(s), right-clicking and selecting ‘Download’. Once downloaded, they can be opened using any compatible application.
Zoom Meetings
Where possible, students are encouraged to use Google Meet, however, students who require a Zoom licence should contact the TEL Team, whereby they’ll receive further instructions.
Screen Sharing
To begin screen sharing, first select the green ‘Share Screen’ icon, located along the bottom of the Zoom interface. Next select the content and how you’d like to share, whether this be, for example, your entire screen, a specific application, or alternatively, select the ‘Advanced’ option, to begin sharing a specific portion of your screen, a video or dedicated device audio.
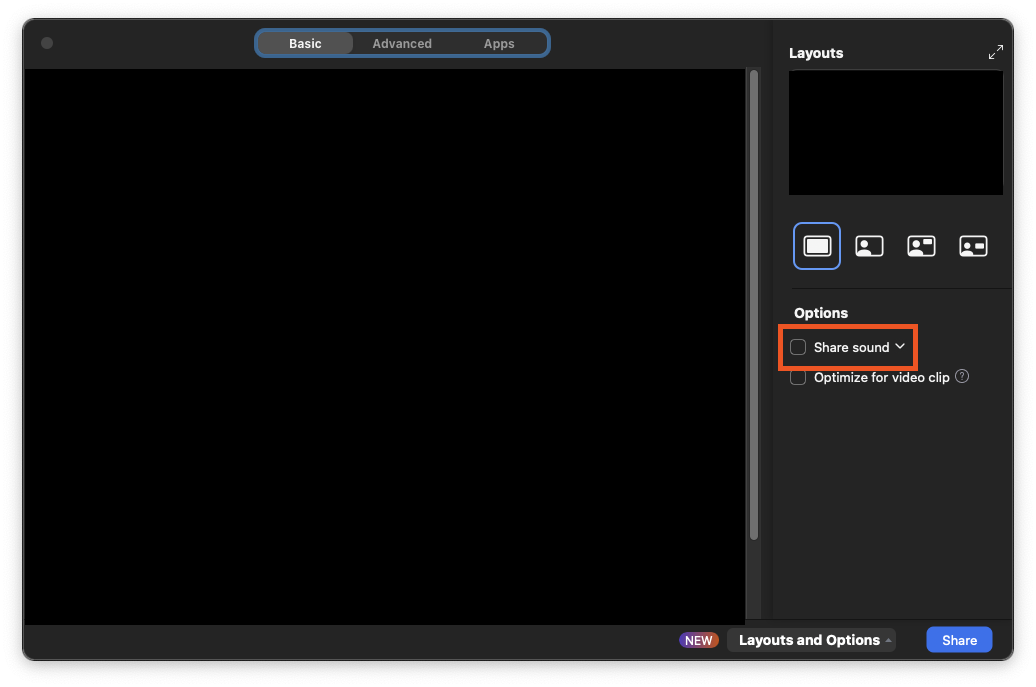
Sharing Audio
While using Zoom, the option to share audio is available across all forms of screen sharing options, however, users will need to specifically select the ‘Share Sound’ option, located within the pop-up window, in instances whereby they’d like to share audio; see the screenshot below for reference.